Your shopping cart is empty!

MENU
Your shopping cart is empty!
This application note was created to showcase the ease of development provided with the release of the GTT Client Library in any hardware/software environment, including the Arduino platform. The GTT Client Library is available within every firmware release, beginning at revision 2.11, and more information regarding its use can be found at www.matrixorbital.com. Additional information regarding the Arduino Uno hardware and compiler used for this project can be found at www.arduino.cc.
The Arduino IDE and installation instructions can both be found under the Downloads heading. Once installed, the Arduino development environment will centre on a simple, C-based language. References for all functions used below can be found on the Arduino website. Adding the GTT Client folder to your Arduino Libraries folder will instantly augment your project with all available GTT commands.
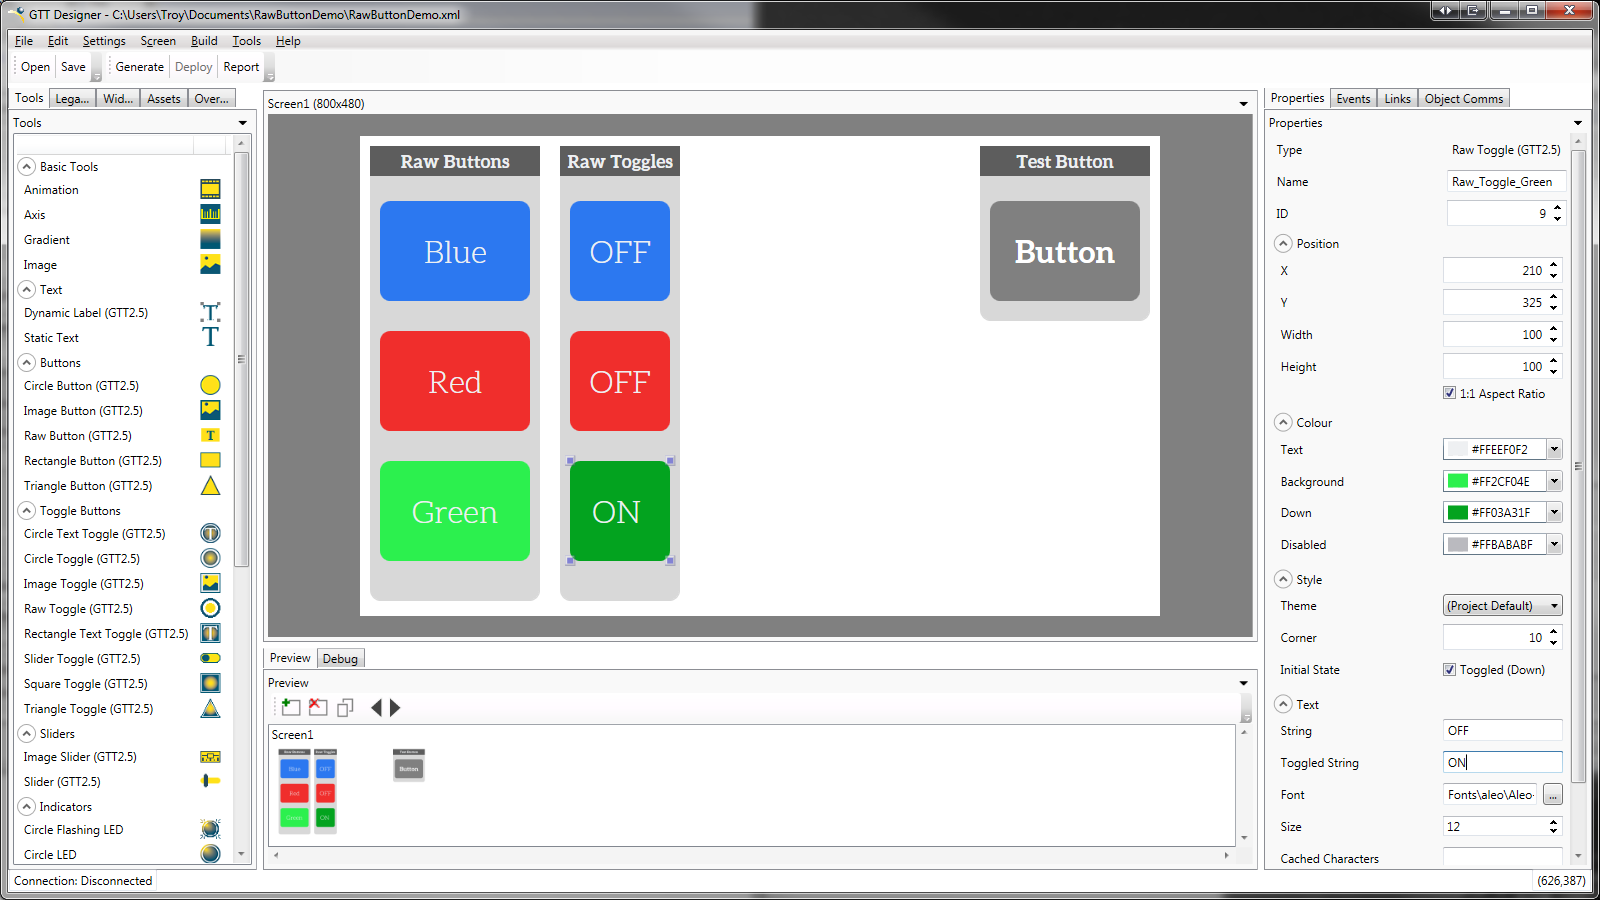
The Graphical User Interface (GUI) used for this demo can be opened using the GTT Designer, version 1.11 or higher, available from https://www.matrixorbital.com/software/gtt-software. This TFT Display Human Machine Interface (HMI) contains three raw buttons and three raw toggle buttons that provide a basic HMI input and a single raw button that demonstrates an HMI output. Access to all elements on the screen is simple and easy using automatically generated functions that tap into the power of the GTT Client Library Application Programming Interface (API).
To upload the GUI to your Matrix Orbital TFT Display, start the Designer with your powered GTT communicating via the Mass Storage USB header, then press the Generate button. Alternatively, the output folder of the GUI demo project can be copied directly to the root folder of your GTT SD card.
All Arduino code and GTT Designer project files required for this HMI demo can be found on Github: https://github.com/MatrixOrbital/GTT-Arduino-RawButton-Demo .
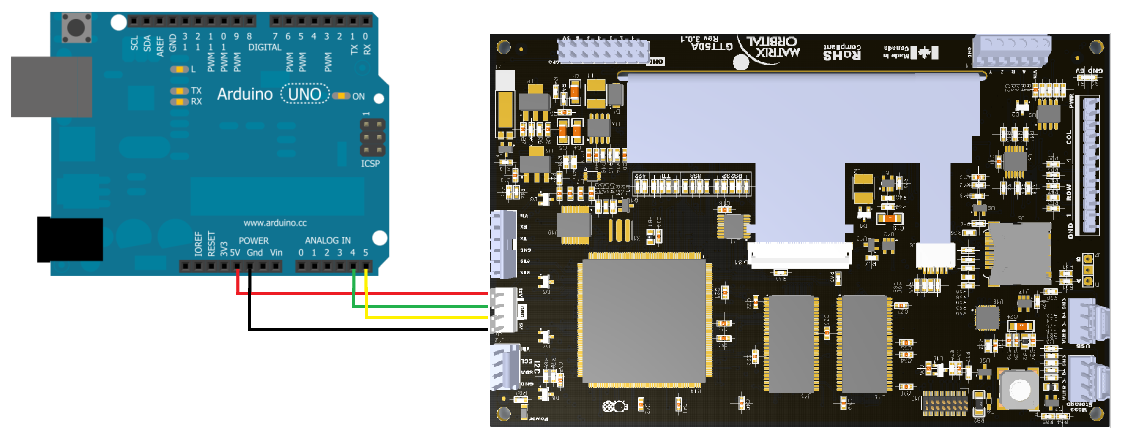 The Display chosen for this HMI demo is a standard Matrix Orbital GTT50A-TPR-BLM-B0-H1-CS-V5 intelligent serial TFT, which includes a native I2C connection. This Display required no hardware changes, but if necessary pull-up resistors can be added to pads at the left of the I2C header.
The Uno board offers SDA and SCL connections via analogue input pins A4 and A5 respectively; revision 3.0 also has dedicated I2C pins above AREF. The cable used was a standard Matrix Orbital BBC Breadboard Cable, connections are shown above.
 To install the GTT Client Library API directly into the Arduino IDE, simply copy the gttclient folder from any GTT firmware release, beginning at revision 2.11, to the libraries directory of your Arduino folder.
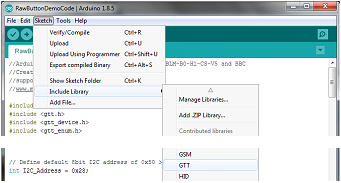
Once the GTT Client Library is installed within your Arduino IDE, it can be quickly and easily attached to any sketch by selecting Edit -> Import Libraries -> GTT.
The Arduino IDE offers a built in I2C library, which can be accessed by including Wire.h in your project. Arduino uses a 7bit I2C address while Matrix Orbital uses 8 bits: the GTT default 0x50 becomes 0x28. Additional information regarding the wire library can be found at http://arduino.cc/en/Reference/Wire.
The GTT Client Library API requires the creation of a transmit buffer to hold data packets to be sent the GTT Display, as well as a receive buffer to hold responses from the GTT HMI that will be parsed. Finally, the GTT Client Library API requires the creation of read and write functions to transfer information to and from the host Arduino Controller, in this case using the built-in I2C functions.
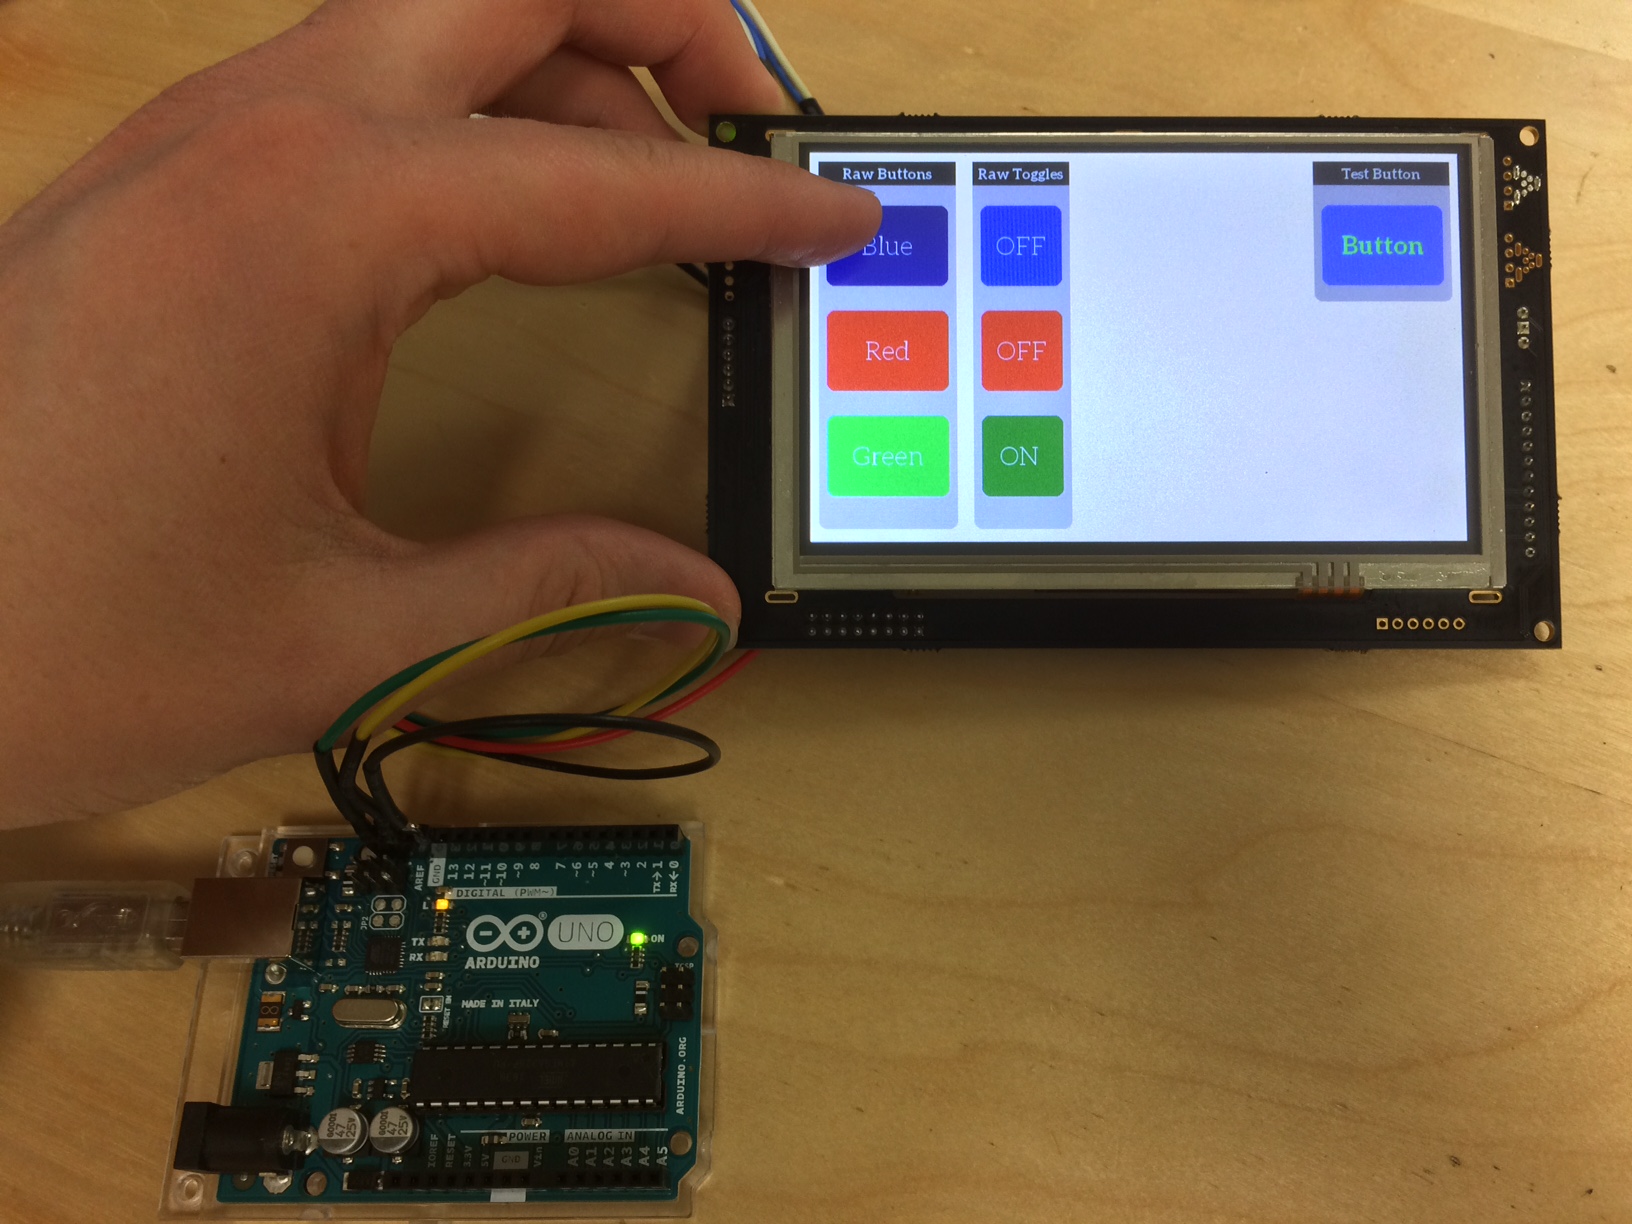
After uploading the GTT Designer GUI design project to your Matrix Orbital intelligent TFT Display, connecting to your Arduino Uno hardware, installing the GTT Client Library API into your Arduino IDE, and uploading the code provided you’ll be ready to run this basic HMI demo.
You’ll see the GTT Client Library API continually parse button responses from your TFT HMI, passing them effortlessly into the button click handler which will in turn provide real-time updates to the simple, yet beautiful GUI.


